


Provide value to your WordPress website visitors by giving each category and tag a description. Everyone wins!
If you have a WordPress blog, it’s likely that you’re using categories and tags to divide up your content. But depending on how you created these in the first place, it’s likely you didn’t set a description for them.
It’s important to spend a bit of time optimizing each category and tag. We do this by giving each one a description, and then double-checking its SEO data to make sure we like what’s there.
Even if your WordPress theme does not show the description on the archive page, it’s worth filling out the description and SEO data just to keep Google happy.
When you first created the category or tag, you probably didn’t put much thought into besides the name. But there’s more to think about! Let’s look at how to set descriptions in WordPress. We’ll use tags as an example here, but it’s pretty much the same for categories.
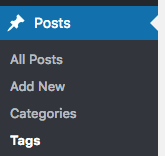
First go to your Tags list, which you can find under the “Posts” menu item in the dashboard.
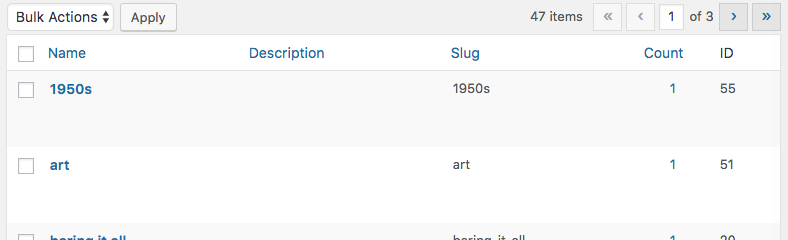
You should now see a list of all your Tags. If you’ve never added descriptions before, the “Description” column will look … pretty empty. Don’t worry! We’re here to fix it.
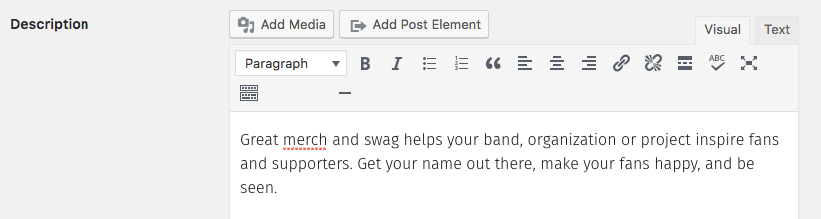
To edit a tag, click its name to go to the Edit window. Under the Name and the Slug, you’ll see a nice text box ready for some content. This is where your short description should go. It might be appropriate to add a link or two here as well. (For instance, if you blog about your band’s tour in support of an album, put a link to the page on your site where the album is for sale.)
And that’s it! You’ve upped your game and elevated your content. Now click the “Update” tag to save your work, and go on to the next tag or category. You got this.
Top photo by Shunya Koide on Unsplash


